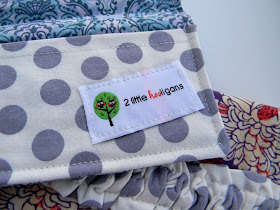
Looking for a quick and easy sewing project for all of those Holiday gifts? Well here is a great one. It takes about 20 minutes from start to finish and you can use your fabric scraps or buy some fat quarters to make up a few. I made up a templet to go by and if you are going to make more then one, I would suggest making a templet too.
Ruffled Checkbook Cover Tutorial
(Beginner project: takes about 20 minutes to make)
*Fabric scraps
*Stabilizer (I like to use the iron on type)
*Cut two pieces of fabric & one piece of stabilizer 7 1/2" X 7".
*Cut two pieces of fabric 6" X 7". This piece is going to be folded in half to make the pockets.
*Cut on piece of fabric 3" X 20". This is going to be used to make the ruffle.
 Iron stabilizer onto the wrong side of one of the 7 1/2" X 7" pieces of fabric.
 Fold the 6" X 7" pieces of fabric in half and iron. Should have this now.
 Take the scrap piece of fabric that is being used for the ruffle and fold in half and iron. Right sides should be facing out.
 Now iron fabric so that the sewed seam is in the middle of fabric and not on the sides.
 On a stitch length of 4, sew down the middle of fabric.
 Pull one thread to make it ruffle.
 Place the ruffle about 1 1/2" from the edge, using the piece of fabric that has the stabilizer ironed onto it.
 Take the smaller pocket pieces and top stitch on the folded edge.
The 7" X 7 1/2" piece of fabric on the bottom, right side facing upwards.
Two of the pocket pieces on opposite ends (folded edges towards the middle).
And
the stabilized piece of fabric is on top, with right side facing down. You can see the ruffle is on the top side.
Mark a 1 1/2" opening on the side for turning the fabric right sides out.
 With a 1/4" sew seam, sew around all the edges, leaving the 1 1/2" opening.
 Trim excess fabric and turn right side out through opening.
 Iron and top stitch with a 1/4" sew seam.


**Please feel free to use this tutorial for your personal sewing projects. You may link this to your blog and use any photo's, just be kind and give credit where credit is due.
Happy sewing!
Any questions or comments please contact me. If you make one using this tutorial please send me an email or add it to my flickr group.


What a great share. Thank you... now if I could learn to sew a straight line. :)
ReplyDeleteI just got my sewing machine working (today) and a plethora of pink fabric (my least favorite color). Me thinks I'll me using this tutorial and making my sister one for her birthday next month. Not only will I get practice on my machine, but I'll get rid of fabric I really don't care for. :)
ReplyDeleteSO CUTE! I love this! I think I will need to make one for myself when I get some free time in the future! =) Are you going to add them to your shop?
ReplyDeleteSo cute! Love your blog-new follower! Where do you find all of your amazing fabrics??
ReplyDeletei "heart" this! i have been looking for ideas to "dress up" my purse and this is so cute and simple. thank you so much for posting!
ReplyDeleteYour featured! todaystoptwenty.blogspot.com
ReplyDeleteShouldn't be a surprise because you rock!
Amanda
Thanks for sharing! Can you tell me what weight stabilizer you used for this beautiful checkbook cover?
ReplyDeleteThanks!
Colleen
Hi Colleen, I used a light weight stabilizer. You can use a thicker one if you would like, that is all that I had on hand:)
ReplyDeleteLovely tutorial and result, it would make a great present. Thank you for sharing. :)
ReplyDelete