Need some organization when it comes to shopping?
Yeah me too! That is why I came up with this shopping list and coupon organizer. I am always forgetting either my shopping list or my coupons at home. I love when I get to the store and realize that they are sitting right on the counter at home. Or worse yet, I get back home and have forgotten that last ingredient needed for supper. I wouldn't have forgotten it in the first place if I had my list to begin with. So instead of putting all 3 kids back into the car and driving down to the good ole Walmart I botch something together for supper. So I'm hoping this new organizer of mine will help me keep track of all my shopping lists, save some money, keep me organized, and keep me from last minute meal plans. I want to say goodbye to this unorganized life of mine when it comes to shopping and meal planning. Now all I have to do is not leave home without it! It may not make my shopping trips funner with all 3 kiddo's, but at least I know it will make them more organized. And an organized momma means a happy momma!

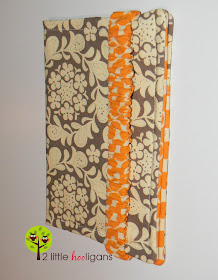
Shopping list and coupon organizer tutorial
*organizer is designed to hold a 4 x 6 pad of paper, pen, small calculator and more!
(allow 1- 1 1/2 hours to make)

Materials Needed:
* 7" zipper
* 9" of a 3/4" anti-roll elastic
* fabric
* 2 pieces of iron on stabilizer (I use pellion brand)
In the main color cut one piece of fabric to the following sizes:
*14" x 8 1/2" (inside of organizer)
*13" x 8 1/2" (outside of organizer)
*9" x 8 1/2" (inside pocket)
In a contrasting color, cut fabric to the following sizes:
*Four pieces of fabric at 4 1/2" x 8 1/2" (zippered pouch)
*21" x 2 1/2" (elastic closure)
*12" x 7" (pocket for pad and pen)
Now that you have all of your pieces cut out, let's get started!
 Gather the 14" x 8 1/2" and 13" x 8 1/2" pieces that will be used for the inside and outside of organizer. Iron on stabilizer to the backs of both of them.
 Fold the 14" x 8 1/2" piece in half. Cut. Now you will have 2 pieces of fabric that are 7" x 8 1/2".
Set aside.Gather the four 4 1/2" x 8 1/2" pieces of fabric that will be used to make the zippered pouch.
 Lay one piece of fabric right side up. Take the zipper and line it up even with the top edge of that piece of fabric. Now take one more piece of fabric and place it on top of the zipper. Make sure all three pieces are line up perfectly. Pin in place.
 Here is a closer look at them all lined up.
 Sew using a zipper foot or if you are like me and don't have one just use your regular foot. It may get a little tricky around where the zipper pull is, but what I usually do is once you get to the zipper I back stitch a few stitches and take my needle out. Then I unzip the zipper and move it out of the way into the area that has already sewn. Again, I make sure the zipper edge is even with the edges of the fabric. Then I finish stitching that side. I have had no problems with this way of doing it. I'm sure a zipper foot would be easier and faster and someday I will get one, but for now this works for me.
 Fold fabric down and iron. This is one side of the pouch, now you need to make the other side.Repeat with the other two pieces of fabric on the other side of the zipper.
 It will look like this before you start sewing. Remember to have the two fabric pieces and zipper all lined up on the upper edge. The right side of the fabric that is showing is from the finished side of the pouch.
 This is what you should have now.
Fold fabric pieces together. The zipper should be on top and all 4 pieces of fabric are on the bottom. Even though the bottom and sides aren't sew still make sure it zips and unzips.
Set aside for now.
Gather the 9" x 8 1/2" piece of fabric that will be used to make the pocket on the inside.Fold wrong sides together and top stitch on folded edge. Piece should now measure 4 1/2" x 8 1/2".
 Gather one of the 14" x 8 1/2" pieces that you cut in half,the zippered pouch,and the pocket piece that you just made.
 Layer all three pieces like so. Make sure all three pieces are even on all three sides. Pin in place and be sure that the zipper pouch is laying flat and zips and unzips once pinned in place. (Maybe I wouldn't be so worried about it zipping properly if I had a zipper foot.)
Set aside for now.
 Gather the 12" x 7" piece of contrasting fabric. Fold piece of fabric in half wrong sides facing, iron, and sew on folded edge. Piece should now measure 6" x 7". This piece will become the pocket for holding the pad of paper and pen.
 Gather the other 14" x 8 1/2" piece of fabric that was cut in half and place the pocket piece that you just made on top of it. Make sure all three raw edges are even. Pin in place.
Now it is time to assemble the inside of the organizer.
 Lay pieces like shown above.
 Lay pieces like shown above.
Take the piece on the right and fold it on top of the piece on the left.


These are the two edges that you will be sewing together.
 Sew and trim off excess fabric.
 Unfold pieces and iron flat.
 Time to make the holder for the pen.
Any questions or comments please do not hesitat to contact me. If you make one using this tutorial, please send me an email or add it to my flickr group. I would love to see it!

 Sew and trim off excess fabric.
 Unfold pieces and iron flat.
 Time to make the holder for the pen.
Measure in 3/4" from where you just sewed the two pieces together. Draw a line vertically and stitch. Now you have a pocket for your pen.
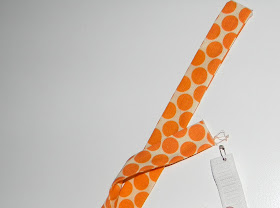
 Gather the elastic and the 21" x 2 1/2" piece of fabric. Time to make the elastic closure. With right sides facing sew piece of fabric together. Turn right sides out and iron.
 Place a safety pin on the end of the 9" piece of elastic.
 Start feeding the elastic through the piece of fabric. Sew the end of the elastic in place with the edge of the fabric before the elastic disappears.
 Keep pulling until the fabric is all bunched and you have about 1/2" of the elastic is hanging out. Sew the elastic in place.
 Take the 13" x 8 1/2" piece of fabric that will be used for the outside of the organizer. Place the elastic closure in about 2" from the edge. Tack elastic in place about 1/8" from the edge.
 Gather the two pieces shown above, it is time to sew them together.
Take pins out of zippered pouch.
Put two pieces together with right sides facing. Make sure the side that will hold the pad of paper and the elastic closure are facing. The zippered pouch will be facing the other piece of fabric. Did I lose you? You just want to make sure the elastic closure and the zippered pouch are not sewn together and that they are on opposite sides.
Sew around the edges leaving a good 2 12" for turning right side out.
 Trim off excess fabric and make sure you square off those corners. The more excess fabric that is left on the edges, the harder it will be to get nice and evenly flat edges.
Pull right sides out through opening.
 Push corners out and iron flat. Make sure all of the sides are nice and flat. Top stitch top of organizer, but make sure you do not top stitch the elastic piece down. Pull the elastic piece out of the way, even if you have to stop top stictching and pull it out of the way. This will allow the elastic to be a little loose and easier to flip over to close the organizer.

Now just fold shut and flip elastic closure over to secure it shut.
And your finished!
Now you are one step closer to being organized, at least when it comes to shopping.


**Please feel free to use this tutorial for your personal sewing projects. You may link this to your blog and use any photo's, just be kind and give credit where credit is due.**
Happy sewing!
 Gather the elastic and the 21" x 2 1/2" piece of fabric. Time to make the elastic closure. With right sides facing sew piece of fabric together. Turn right sides out and iron.
 Place a safety pin on the end of the 9" piece of elastic.
 Start feeding the elastic through the piece of fabric. Sew the end of the elastic in place with the edge of the fabric before the elastic disappears.
 Keep pulling until the fabric is all bunched and you have about 1/2" of the elastic is hanging out. Sew the elastic in place.
 Take the 13" x 8 1/2" piece of fabric that will be used for the outside of the organizer. Place the elastic closure in about 2" from the edge. Tack elastic in place about 1/8" from the edge.
 Gather the two pieces shown above, it is time to sew them together.
Take pins out of zippered pouch.
Put two pieces together with right sides facing. Make sure the side that will hold the pad of paper and the elastic closure are facing. The zippered pouch will be facing the other piece of fabric. Did I lose you? You just want to make sure the elastic closure and the zippered pouch are not sewn together and that they are on opposite sides.
Sew around the edges leaving a good 2 12" for turning right side out.
 Trim off excess fabric and make sure you square off those corners. The more excess fabric that is left on the edges, the harder it will be to get nice and evenly flat edges.
Pull right sides out through opening.
 Push corners out and iron flat. Make sure all of the sides are nice and flat. Top stitch top of organizer, but make sure you do not top stitch the elastic piece down. Pull the elastic piece out of the way, even if you have to stop top stictching and pull it out of the way. This will allow the elastic to be a little loose and easier to flip over to close the organizer.
Now just fold shut and flip elastic closure over to secure it shut.
And your finished!
Now you are one step closer to being organized, at least when it comes to shopping.


**Please feel free to use this tutorial for your personal sewing projects. You may link this to your blog and use any photo's, just be kind and give credit where credit is due.**
Happy sewing!
Any questions or comments please do not hesitat to contact me. If you make one using this tutorial, please send me an email or add it to my flickr group. I would love to see it!
Oh this just absolutely made my day! I loved this project when I saw it the other day! Thank you for the tutorial! I appreciate all your hard work!
ReplyDeleteThis is awesome! I've been wanting to make one of these for awhile, but haven't known where to start. Thanks for the tutorial!!
ReplyDeleteOMG...it's like you read my mind! I need to make one of these asap! Love!!!!!!!!!
ReplyDeleteWOOT WOOT!!! I was hoping you would put this tutorial up! Thank you so much!
ReplyDeleteI love this! I've never seen a closure done like that with fabric covering elastic. Adding this one to my to-sew list...
ReplyDeleteWow this is awesome!! Thanks so much for the tutorial!
ReplyDeleteI love the fabric choices! I am not the best seamstress, but I do love to coupon. Great job!
ReplyDeleteChristine
greatoakcircle.com
What a great project - I really need to make one of these! Thanks for the clear, thorough tutorial.
ReplyDeleteThis looks fantastic! Great job :)
ReplyDeleteTwo questions for you...
ReplyDeleteHow big should each piece of stablizer be?
And in this step:
"Layer all three pieces like so. Make sure all three pieces are even on all three sides. Pin in place and be sure that the zipper pouch is laying flat and zips and unzips once pinned in place." I was looking for some more clarity, I can't seem to see how all three pices are supposed to lay. I only see the two.
Thanks! Love the idea!!
Made one this weekend! I don't coupon, but it is great for holding a note pad in my purse! It comes in handy when I suddenly get inspired with an idea for a new project. I like the product so much that I have come up with a design to make a holder for my Barnes and Noble NOOK. It has to be a bit more sturdy for that though.
ReplyDeleteOh my gosh! This tutorial is amazing! I found your blog tonight and made this cute shopping organiser already! It's the first sewing project I've been able to start and finish in one evening, thank you so much for a fantastic tutorial!
ReplyDeleteWow, that is gorgeous. I made one, from anther tutorial that I found, that is a really pretty green and white pattern – no zipper though. :( I love these colors and style.
ReplyDeleteI saw this on Pinterest & wanted to tell you what a GREAT tutorial it is! I made a similar one from Fons & Porter's TV show & your instructions were MUCH easier to follow.
ReplyDeleteThank you!
Hi! I love this tutorial, but I do have one question... So we take the 14 x 8.5 piece and cut it in half, which gives us two pieces that are 7 inches wide x 8.5 inches high, as you said. Then later when we make the pen/paper pocket from the piece of fabric that is 12 x 6.5, we get a pocket that is 6.5 inches wide x 6 inches tall, which you also said was right. But how does it work that a 6.5 inch wide pocket will line up on three sides with a 7 inch wide backing piece? Your text says the numbers I've quoted, but your pictures show everything lining up very nicely...I'm confused. Shouldn't the pocket be 7 inches wide, as well? Please help! Thanks :)
ReplyDeleteI made the coupon organizer today for my sister. Thanks for writting such a great tutorial.
ReplyDeleteSuper Cute. Should help me with coupon organization. Now to check my sewing supplies - would love to make one this week-end. PS: I saw this on Pinterest
ReplyDeleteHi! Thank you for posting this very detailed tutorial! :) im making one as i type this! I think I have the same question as "N" above... My 6.5" wide pocket does not fit the 7" wide backing piece? Was the original piece meant to be 7"x12"?
ReplyDeleteN and Cola thank you so much for drawing this to my attention. I fixed the tutorial. The pocket piece should have measured 7 x 12 like you said Cola. You will not have to start over. just trim the excess fabric off. you may need to trim again once lined up with the outside fabric as well. sorry about that!
ReplyDeleteDo you sell them???
ReplyDeletei made it! twice to be honest! you can see one version here: http://www.cliodana.blogspot.com/2012/03/prise-2-pour-lepicerie.html
ReplyDeletethank's again for the tute
This tutorial is awesome, thank you so much! One silly question... how many yards of fabric in each print do you need?
ReplyDelete